The work skirt went well in the end, with a few tweaks. So I am making some more like it...
Radius of waist circle: 13"
Length of waistband: 49" including overlap and seam allowance
Size of waistband dart: 1" from start to fold so 2" total in each
Cut:


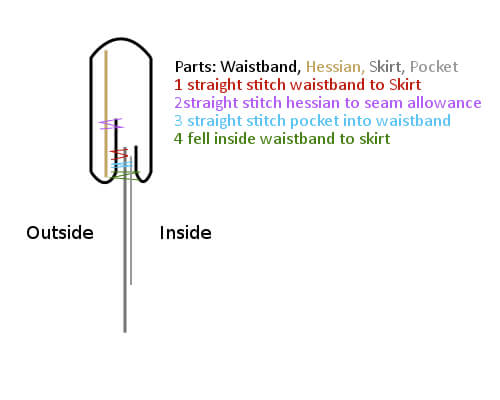
The waistband attaches to the skirt with the opening at the back and the overlap to close. Sew in the darts, then the bottom with a large 2" seam allowance folded under, right side to right side and straight stitch to the top of the skirt. Interfacing (hessian) is put in and secured to the top of the seam allowance. Then the pockets are added, cutting the sides carefully. The back of the waistband with a small seam allowance is then folded over the whole lot and felled into place.
Waistband:
Easiest pocket option so far has been to create a little psuedo seam on each side by just folding the fabric in and stitching from the bottom up to the bottom edge of the pocket, and down from the top to the top edge of the pocket. Then cutting the fabric in between and using the inside edge to sew the pocket to, right side to right side. Using a buttonhole like stictch to reinforce the top and bottom made it feel more secure.
Notes:
- It came up longer than expected, easily fixable if desired but I quite liked the length.
- Pockets should be bigger. I made them what I thought was enormous, they are ok, they could definately be bigger. Big pockets are excellent.
- I added two little patch pockets inside the big pockets the same size as my glasses - I put my glasses in my pocket far too often and they get all mixed up with my keys so this will solve that.
No comments:
Post a Comment